Introduction
Hey, this is Jamie with Useful Knowledge. Today, I’m excited to share with you a simple way to make homemade apple jelly using store-bought apple juice. This recipe is a time-saver compared to traditional methods of making apple jelly from scratch. So, let’s dive into the step-by-step process of creating delicious apple jelly at home.
All-Natural Ingredients
The key to this homemade apple jelly recipe is using all-natural ingredients. When selecting apple juice from the store, make sure it is all-natural. In this recipe, we also use raw cane sugar and pectin. Opt for pectin like regular Sure-Jell, which is all-natural as well.
Preparation and Boiling
Start by preheating 7 to 8 ounce mason jars in the oven at 250 degrees. The recipe includes 4 cups of apple juice mixed with one package of Sure-Jell pectin. Stir the pectin into the juice and bring it to a full rolling boil. Once it reaches a boil, continue stirring for about a minute to maintain the full rolling boil.
Adding Sugar and Boiling
After boiling the juice and pectin mixture, add 4.5 cups of sugar. Stir well to dissolve the sugar completely, ensuring there are no clumps. Bring the mixture to a boil again and maintain a full rolling boil for one minute.
Canning Process
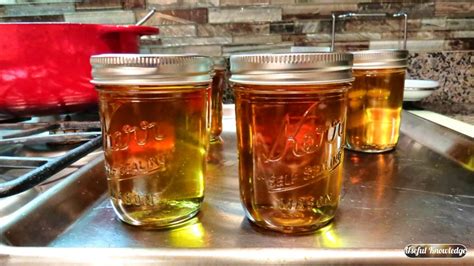
Once the jelly mixture is ready, skim off any foam that may have formed on the surface. Use a canning funnel to fill the preheated jars with the jelly mixture, leaving a perfect headspace at the top. Wipe the rims of the jars with a wet paper towel to ensure a clean seal.
Jarring and Sealing
After filling the jars, place the lids on top of each jar, ensuring they are clean and dry. Secure the lids with bands and tighten them before turning the jars upside down. Allow the jars to sit upside down for five minutes before returning them to their upright position.
Final Steps and Enjoyment
Once the jars are sealed, let them sit for about 30 minutes. As they cool, you may hear a satisfying “ping” sound indicating a proper seal. The next morning, check your apple jelly, and it’s ready to be enjoyed. Spread it on toast or use it in your favorite recipes. We hope you found this process of making homemade apple jelly insightful and easy.
Related Questions
1. How long does it take to boil the apple juice and pectin mixture?
– It takes about a minute to achieve a full rolling boil after adding the pectin.
2. Why is it essential to use all-natural ingredients in this apple jelly recipe?
– Using all-natural ingredients ensures a healthier and more authentic flavor in the homemade apple jelly.
3. What is the purpose of preheating the mason jars before filling them with the jelly?
– Preheating the jars helps prevent them from cracking when filled with the hot jelly mixture.
4. How can you tell if the jars have sealed properly after the canning process?
– You may hear a “ping” sound as the jars cool, indicating a proper seal. Additionally, lids should be slightly indented and not pop up when pressed.
5. Can homemade apple jelly be stored for an extended period, and what is the best way to store it?
– Yes, homemade apple jelly can be stored for several months in a cool, dark place. It is best to store it in a pantry or cupboard away from direct sunlight.